Set Up Intel® XDK IoT Edition - Run a Sample Project
This document will guide you through creating and running a Hello Word project (blinking the onboard LED) on the Intel® Edison.
Create a project
The Intel® XDK IoT Edition has various project creation options. To start, create a blinking LED project from a pre-existing sample.
View detailed instructions for creating a project from templates »
Select a target IoT device
Select an Intel® Edison to program. The Intel® XDK IoT Edition will automatically detect Intel® IoT devices on your network and display them in the “IoT Device” drop down list.
View detailed instructions on selecting a target device »
Sync device clocks
Sync your computer’s time with the clock on the target board to avoid timing issues. Do this step any time you connect to a new target IoT device or the device has been powered off.
View detailed instructions on syncing the clock »
Upload and run the application
Upload the project files to the IoT device and run it. Remember that every time you make changes to files and you want to see the changes: (1) save the file, (2) upload, (3) run.
View detailed instructions on uploading and running an app »
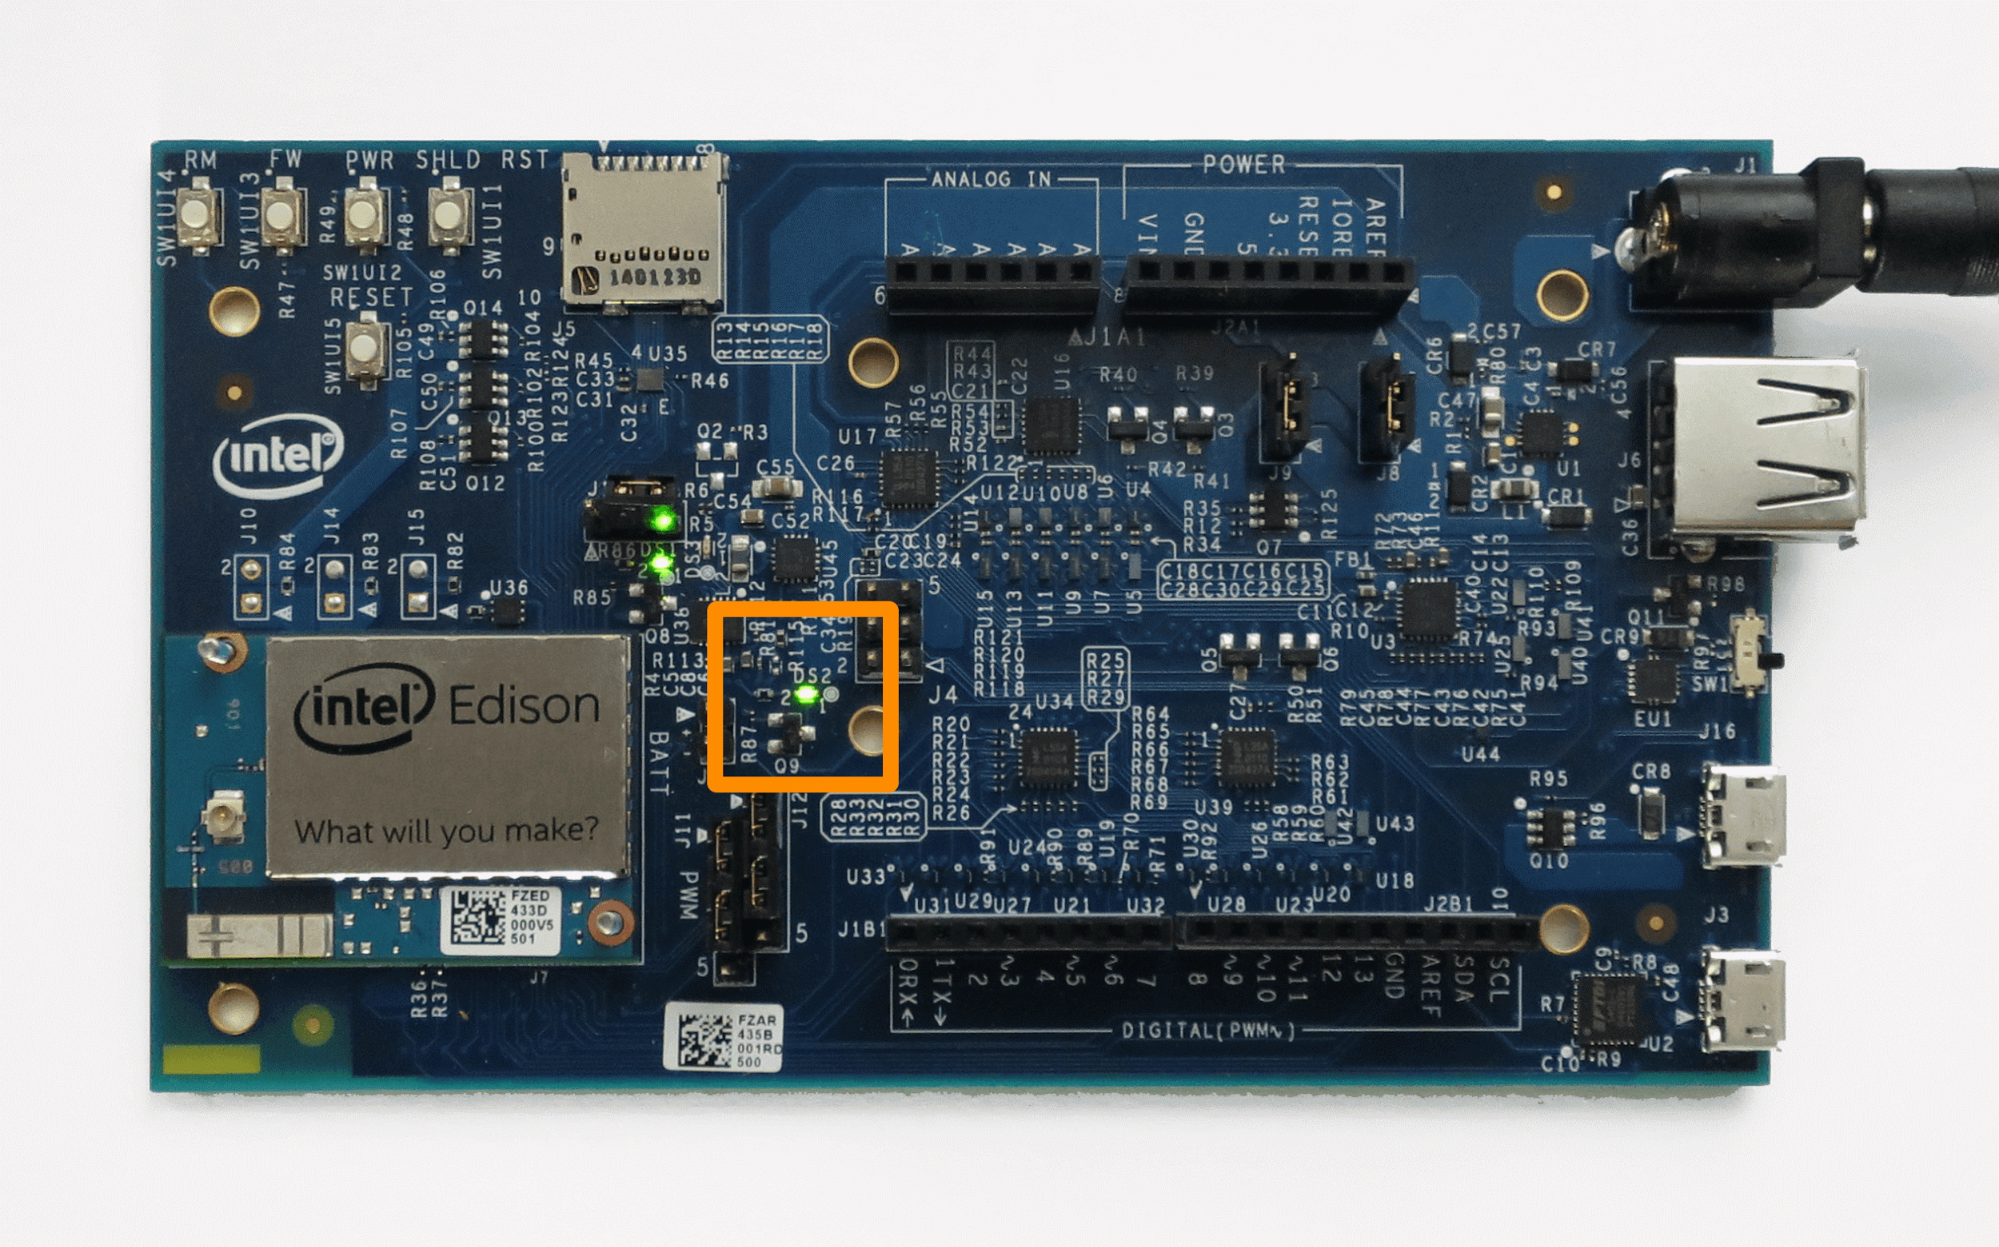
Check your Intel® Edison for a blinking light
The LED is located near the center of the board.
Congratulations, you just ran your first Intel® XDK application!
Having troubles? Refer to the Troubleshooting »
You should now be able to successfully program the Intel® Edison and the onboard LED should be blinking.