Shell Access - Windows
![]()
If you need to configure your IoT board, you will need to remotely connect to the Intel® Edison or Intel® Galileo. Once connected to your Intel® IoT board, you have access to the Linux-based Yocto operating system running on the board.
You can then execute special Linux commands such: changing the hostname and password, setting up Wi-Fi, or flashing new firmware.
Download a terminal client (PuTTY)
Windows does not come with a built-in terminal emulator so download and use the PuTTY client.
Identify the serial COM port
Use Device Manager to find the COM port number for the “USB Serial Port” connection. You will need the COM # to configure PuTTY in Establish a serial connection next.
Establish a serial connection
Use PuTTY to establish a serial connection to the IoT board using the COM # you noted in the previous Identify the serial COM port section and the baud rate 115200.
Configure a password to enable SSH
You must enable SSH in order to work with the Intel® XDK and Eclipse over Wi-Fi. Setting a password on your Intel® Edison by running configure_edison --password will enable SSH.
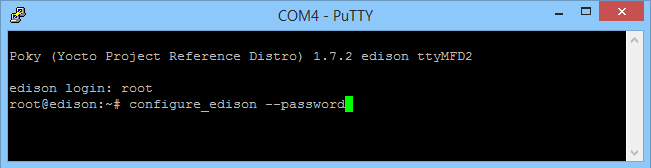
You are now logged into your IoT board and can run shell commands.